
Transpose Data on Google Sheets: We can convert the rows into columns and columns into rows with the help of Google sheets transpose functions. There are 2 methods by which we can transpose the data in Google sheets and they are: Using TRANSPOSE function, Paste function.
However, the method you choose to interchange the rows and columns will depend on whether you want your data to be set in static or dynamic. In this article let’s discuss everything about transposing data in Google sheets in detail.
Also Read: Java Program to Print Alphabet T Star Pattern
Also, check our article Google sheets tricks and tips which will serve you as a great help to deal with sheets.
Transpose Data Using Paste Special
Let’s understand how to transpose data from one sheet to another with the help of the following example.
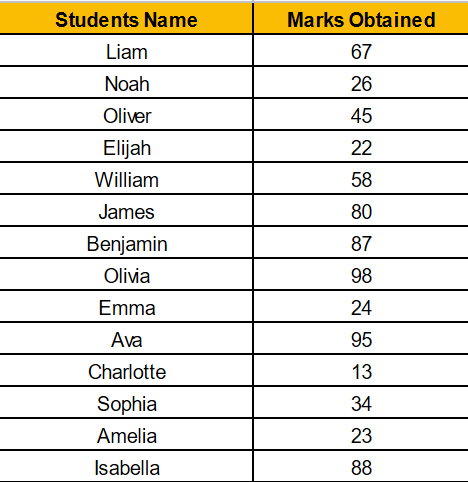
In the above example, by using the paste special, we cannot convert the columns into rows. Where row 1 will have the names and row 2 will have marks.
Google Sheet Transpose Functions Steps
- Step 1: Select the data which you want to transpose.
- Step 2: Copy the data. Use the keyboard shortcut “Cntrl+C” to copy the data.
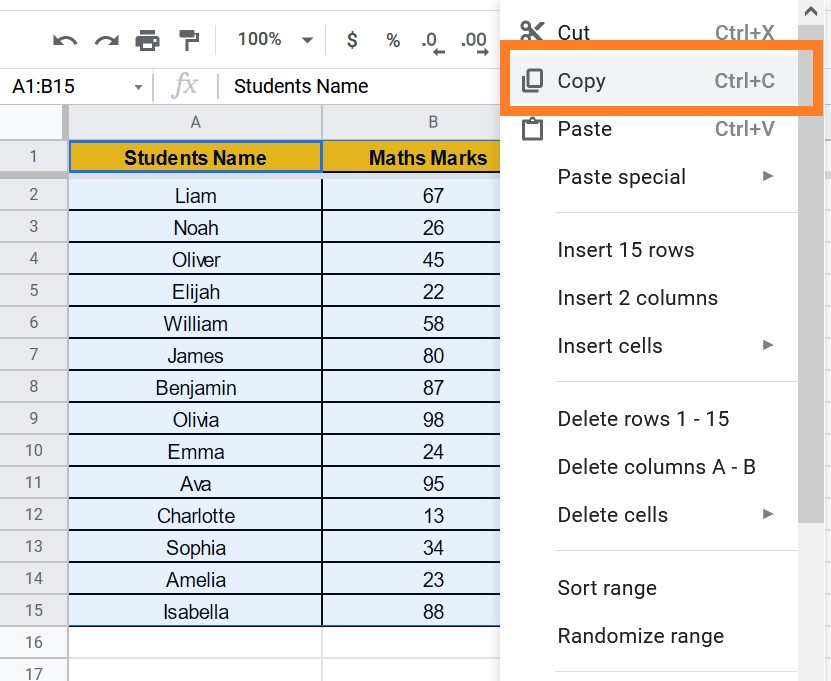
- Step 3: Now select the cell where you would like to transpose data.
- Step 4: Now Right-click and hover over the “Paste Special“.
- Step 5: Select the “Paste Transposed“.
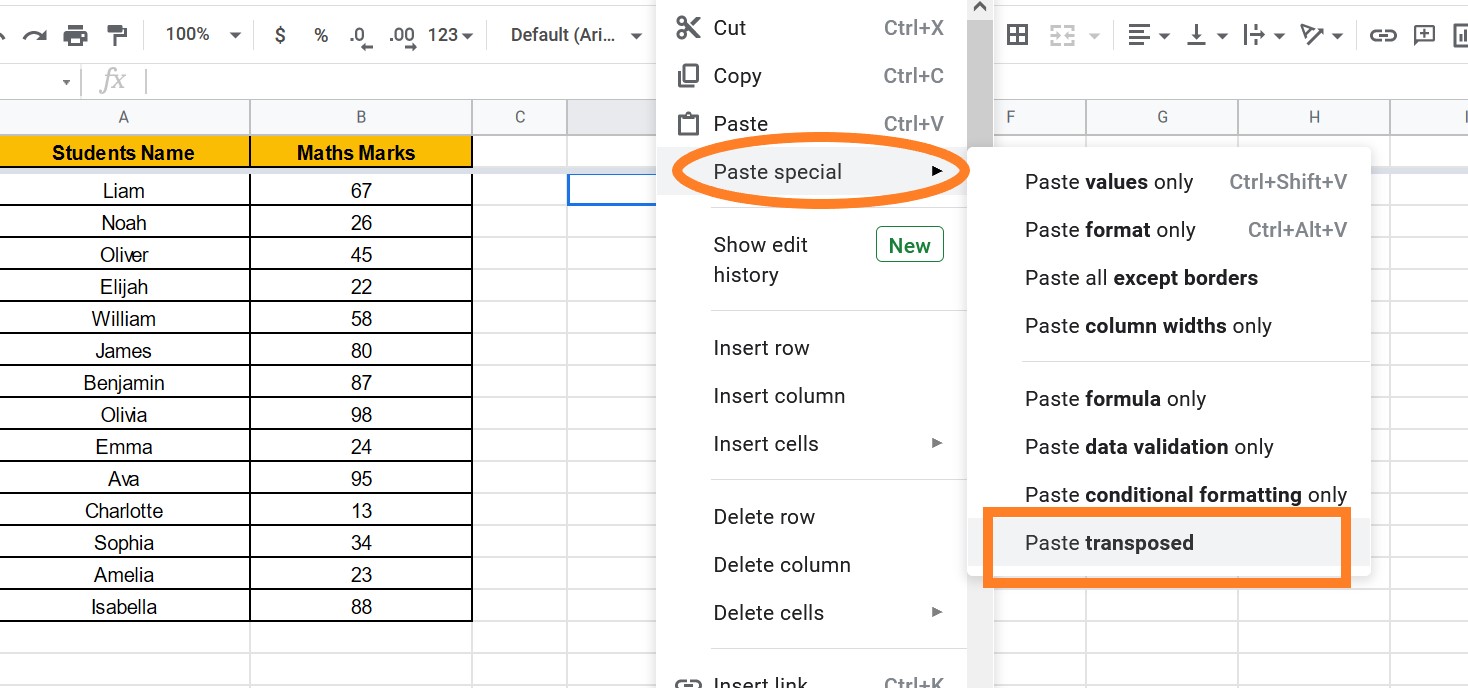
- Step 6: Click “Enter“.
The data will be transposed as shown in the image below.
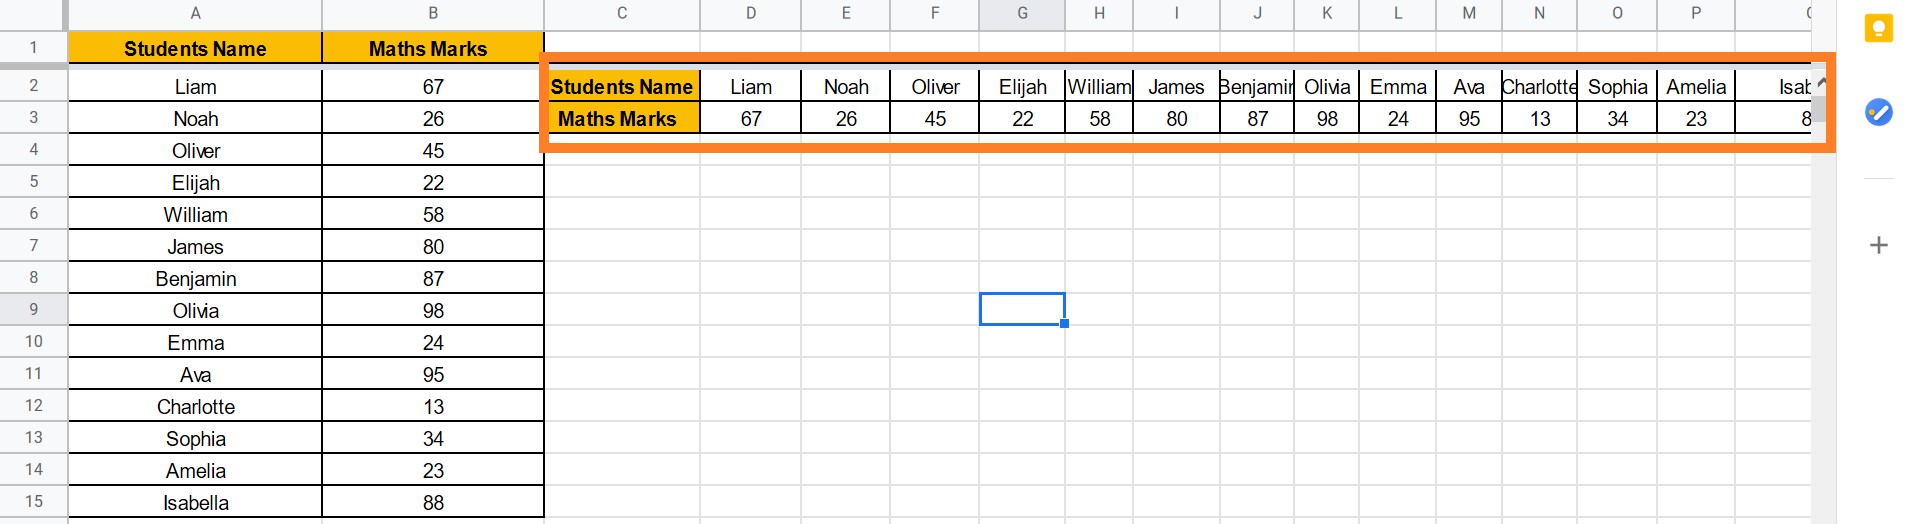
Note that it transposes all the values, data, and formatting. Also, the data transferred is static. If the data changes, you will have to repeat the steps above in order to get the new data transposed.
- How to Convert Rows to Columns or Backwards in Google Sheets?
- How to Alphabetize Comma-Separated Strings in Google Sheets?
- How to Make an Organization Chart in Google Sheets? – Create an Org Chart in Google Sheets
For dynamic transposition of the data, we will have to use the TRANSPOSE function which is explained below.
Transpose Data Using TRANSPOSE Function
With the same data set shown above, we will try to transpose the function. Now to transpose the data on Google Sheets by using the TRANSPOSE Function are given below:
- Step 1: Select the Cell.
- Step 2: Now enter the formula “=TRANSPOSE(Cell Range)“. Here we have selected the cells from A1:C15.
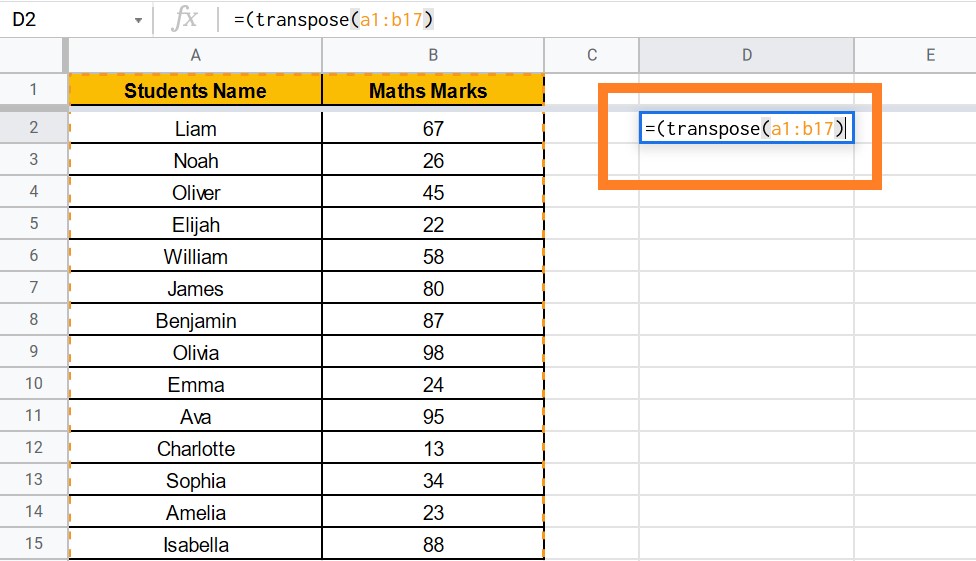
- Step 3: Press the “Enter” button.
The data will be transposed as shown below.
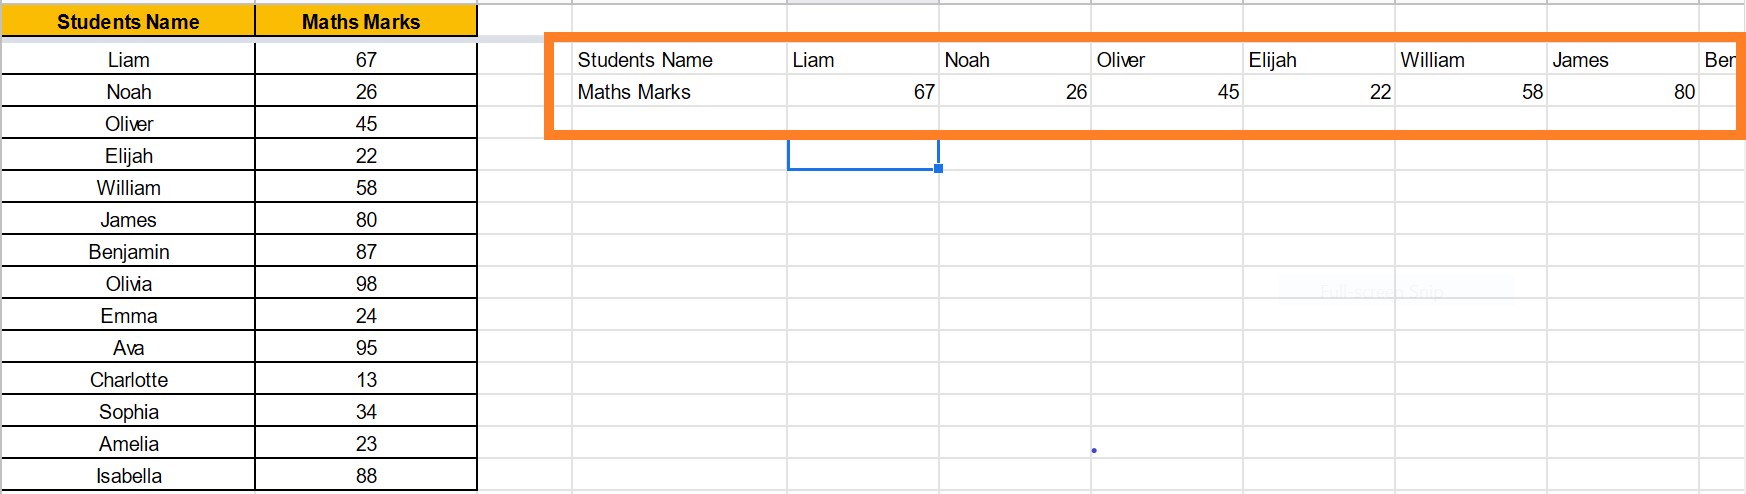
Note: In the above image, you can see that only values are pasted and formatting is not pasted.
The number of rows/columns of the data set automatically identifies Google Sheets and the number of rows/columns transposed in the transposed data takes up the relevant number.
All you have to ensure that the transposed data is sourced in empty cells. When a cell has a text/number or even a space character, the formula TRANSPOSE would not work and result in the Reference error (“REF” error). If you click on the “REF” error, it will mention what kind of error i.e, which cell is empty and so on.
Note also that some of the transposed data arrays cannot be removed. If the transposed data is to be deleted, the entire data set must be deleted.
FAQs on Google Sheet Transpose Functions
Question 1.
How to transpose multiple rows on Google sheets?
Answer:
Select the cells where you would like to transpose the data and enter the formula as “=TRANSPOSE(Cell Range)”.
Question 2.
How do I transpose columns and rows in Google Sheets?
Answer:
In order to transpose columns and rows on Google Sheets, we can use either “Paste Special” or “TRANSPOSE” functions.
Question 3.
For Google sheets transpose with formatting, which method should be used?
Answer:
We should use the “Paste Special” method to transpose the data with formatting.