
Have you ever thought of sending emails from Google Sheets automatically? If yes, then this article is for you. You can send emails from Google Sheets in two ways. You have the option of using a Google-provided library or a third-party email service provider such as MailChimp or SendGrid.
In this article, let’s discuss how to send emails with the help of Google provided library with the help of Google Sheet tips provided on this page. Read on to find more.
Table of Contents |
How to Automatically Send a Single Email in Google Sheets Using Appscript?
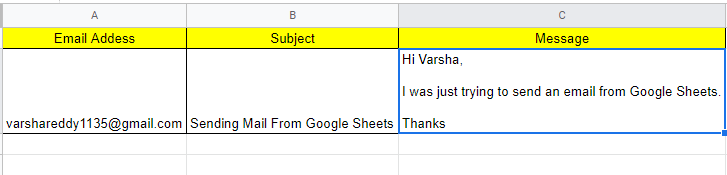
Let us understand how to send an email to a single recipient in Google Sheets. For that, we should create a sample dataset as shown in the image below:
Syntax to Send Email Using AppScript in Google Sheets
The syntax to send an email using Appscript in Google Sheets are explained below:
MailApp.sendEmail(emailAddress, subject, message);
In the above syntax, the references to the corresponding cells can be used to replace emailAddress, subject, and message.
- How to Create Filter Views in Google Sheets? (Share/Delete/Save/Duplicate Filter Views)
- How to Remove Duplicates in Google Sheets? (Using Unique Function)
- How to Use IMPORTDATA function in Google Sheets? (Fetch CSV/TSV File)
Steps to Send Email Using Appscript in Google Sheets
Follow the steps as listed below to send an email from Google Sheets to the respective email using Appscript:
- Step 1: Open the Google Sheets and enter the above sample dataset.
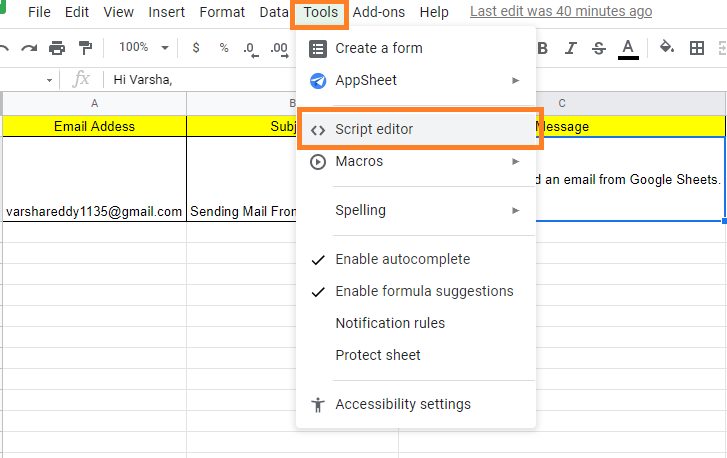
- Step 2: Now click the “Tools” tab in the menubar.
- Step 3: Select “Script Editor” from the drop-down menu.
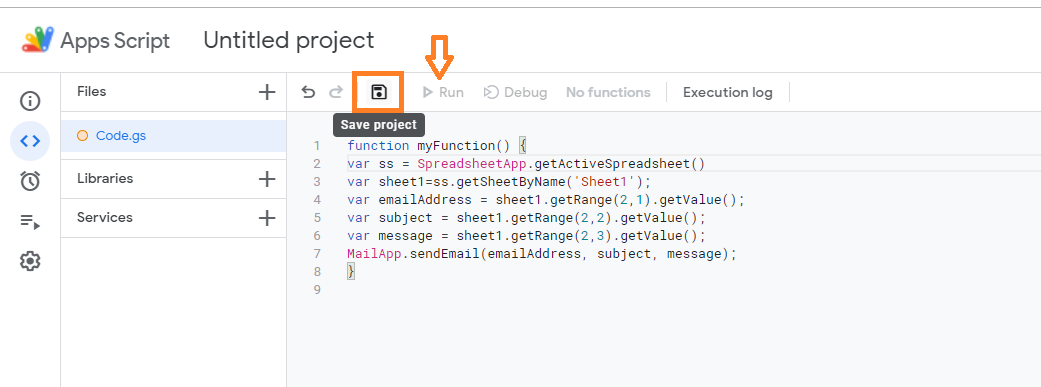
- Step 4: Now a script editor screen will open on the screen. Now enter the following code inside the curly braces as shown in the image below the code.
| var ss = SpreadsheetApp.getActiveSpreadsheet() var sheet1=ss.getSheetByName(‘Sheet1’); var emailAddress = sheet1.getRange(2,1).getValue(); var subject = sheet1.getRange(2,2).getValue(); var message = sheet1.getRange(2,3).getValue(); MailApp.sendEmail(emailAddress, subject, message); |
Code Source: devloper.google.com
- Step 5: Now click on the “File” and hit the “Save” button.
- Step 6: Click Run after selecting the function sendEmails from the function dropdown box.
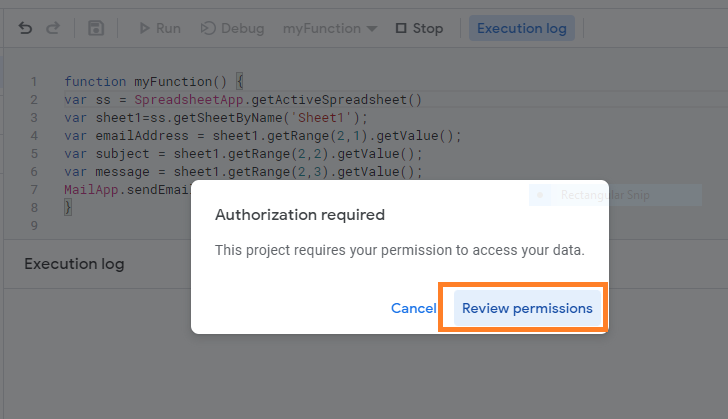
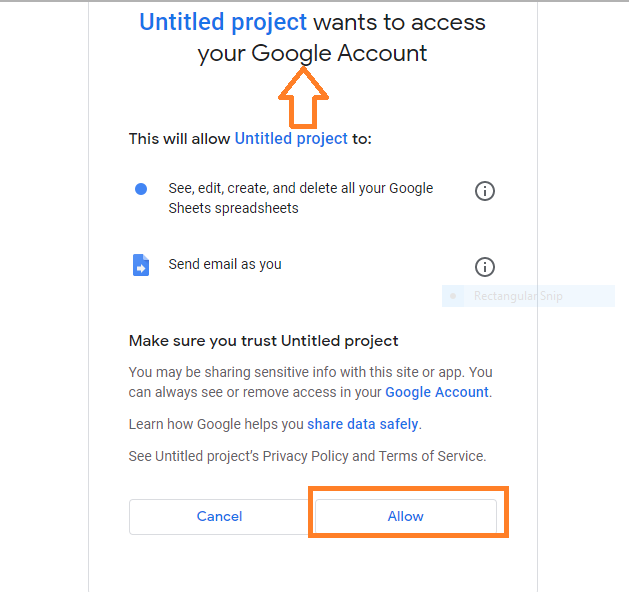
- Step 7: When you run the code, you will be prompted to provide access to your Google sheet’s data.
- a. Select Review Permissions from the drop-down menu.
- b. You will then be informed that Google has not recognized your App and that you should proceed only if you are familiar with the creator. You are, after all, the author, therefore you clearly don’t mind. Scroll down and click ‘Go to sendEmail‘ after clicking Advanced.
- c. Simply click Allow when you receive the confirmation.
Once the Code Running is done, the mail will be sent.
Code Explanation:
We acquire access to the spreadsheet named ‘Sheet1′ in the first two lines and store a handle to it in a variable called sheet1. Three variables – emailAddress, subject, and message – are created in lines 3, 4, and 5. We assign the value from the second row, the first column (cell A2) to the variable emailAddress using Sheet1’s getRange() function. Similarly, the variable subject is assigned to the value in the second row, the second column (B2), and the variable message is assigned to the value in the second row, the third column (C2).
How to Send an Email to Multiple Mails in Google Sheets?
Follow the steps listed below to send an email to multiple emails addresses:
- Step 1: Create a new empty Spreadsheet.
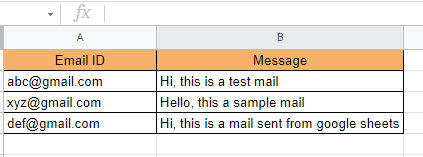
- Step 2: Add a few data rows. In column A, each row should have an email address and in column B, the email message to be sent to that person. You might want to use your personal email address in column A for testing purposes. Here’s an illustration:
- Step 3: Click on the “Tools” tab and select “Script editor” from the drop down menu.
- Step 4: Now Script editor will open towards the right side of the screen. Now copy and paste the following script code.
| /** * Sends emails with data from the current spreadsheet. */ function sendEmails() { var sheet = SpreadsheetApp.getActiveSheet(); var startRow = 2; // First row of data to process var numRows = 2; // Number of rows to process // Fetch the range of cells A2:B3 var dataRange = sheet.getRange(startRow, 1, numRows, 2); // Fetch values for each row in the Range. var data = dataRange.getValues(); for (var i in data) { var row = data[i]; var emailAddress = row[0]; // First column var message = row[1]; // Second column var subject = ‘Sending emails from a Spreadsheet’; MailApp.sendEmail(emailAddress, subject, message); } } |
Code Source: devloper.google.com
- Step 5: Click on the “Save” button to save the script code.
- Step 6: Choose sendEmails function from the drop-down list of functions, then click Run.
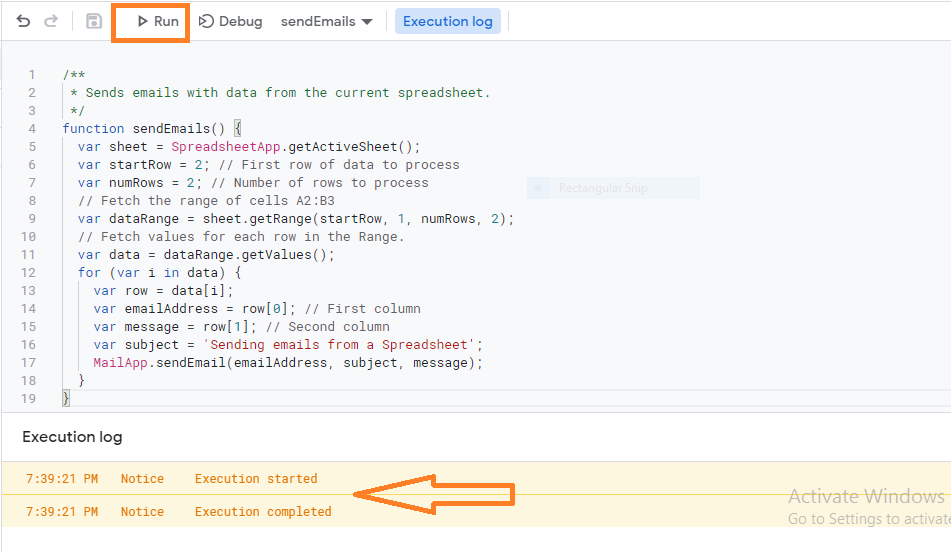
- Step 7: Once the code is executed successfully, the email is sent to desired recipients.
How to Know if Mail Is Sent in Google Sheets?
Every time an email is sent, you might want to mark a cell in each row. It will also allow you to execute the code again later if your script stops working (for example, if there is a flaw in your code, or if you exceed the maximum amount of emails you can send per minute or per day).
For each row, after sendEmail is called, the cells in column C are set to ‘EMAIL SENT.
To execute this, open the script editor from the Tools tab and paste the following code. Soon after pasting the code, click on save and run the code.
| // This constant is written in column C for rows for which an email // has been sent successfully. var EMAIL_SENT = ‘EMAIL_SENT’; /** * Sends non-duplicate emails with data from the current spreadsheet. */ function sendEmails2() { var sheet = SpreadsheetApp.getActiveSheet(); var startRow = 2; // First row of data to process var numRows = 2; // Number of rows to process // Fetch the range of cells A2:B3 var dataRange = sheet.getRange(startRow, 1, numRows, 3); // Fetch values for each row in the Range. var data = dataRange.getValues(); for (var i = 0; i < data.length; ++i) { var row = data[i]; var emailAddress = row[0]; // First column var message = row[1]; // Second column var emailSent = row[2]; // Third column if (emailSent !== EMAIL_SENT) { // Prevents sending duplicates var subject = ‘Sending emails from a Spreadsheet’; MailApp.sendEmail(emailAddress, subject, message); sheet.getRange(startRow + i, 3).setValue(EMAIL_SENT); // Make sure the cell is updated right away in case the script is interrupted SpreadsheetApp.flush(); } } } |
Code Source: devloper.google.com