Setting Print Area in Google Sheet: You can utilise the Print function to transmit information or data from a Google Spreadsheet to a printed piece of paper. Unlike Excel files, we don’t have the permanent settings option in Google Sheet. Thus one will have to define the Print area to print the data into the Paper.
When you define the Print area in Google Sheets using the Print function, the function says how to print the data from the spreadsheet to the paper. On this page, let’s discuss how to format Google Sheets for Printing along with important Google Sheet Tips. Read on to find more.
Also Read: Java Program to Print Triangular Number Series 1 3 6 10 15 …N
How to Print Range of Cells in Google Sheets?
Let’s assume, we have more than hundreds of cells and we just need to print only the first 20 cells. We can define the cell range which needs to print from the Google Sheet to the paper by following the steps listed below:
- Step 1: Select the cells until till where you would like to print the data into the sheet. Here I am selecting the first 20 cells.
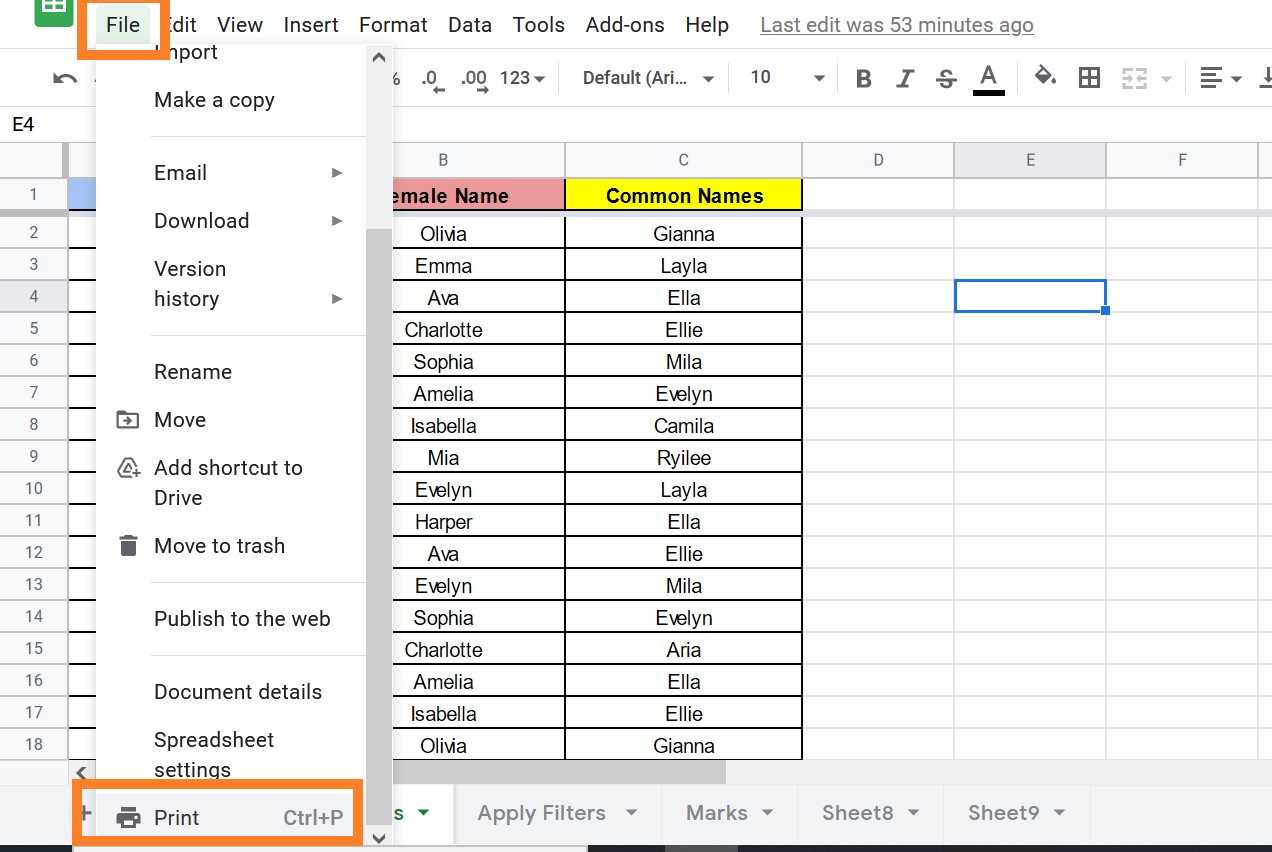
- Step 2: Now click on “File” and select the “Print” function from the drop-down menu as shown below. You can also use the keyboard shortcut CNTRL + P (“CMD+P” on Mac).
- Step 3: A Print menu will open on the screen. Click on “Current Sheet” from the Print icon.
- Step 4: Now select “Selected Cells” from the Print icon menu.
- Step 5: Here click on the “Next” icon.
- Step 6: Check the “Preview” section and hit on “Print” button.

The selected range of cells will be printed into the physical paper.
- How to Create a Drop Down List in Google Sheets: Add/Remove/Customize Drop Down Menu
- How to VLOOKUP from Another Sheet in Google Sheets: Vlookup Between Two Sheets
- How to Wrap Text in Google Sheets: Expand Cell using Text Wrap
How to Set Print Area to Print Everything on Google Spreadsheet?
You can just print everything on the spreadsheet with 3 steps which are explained below.
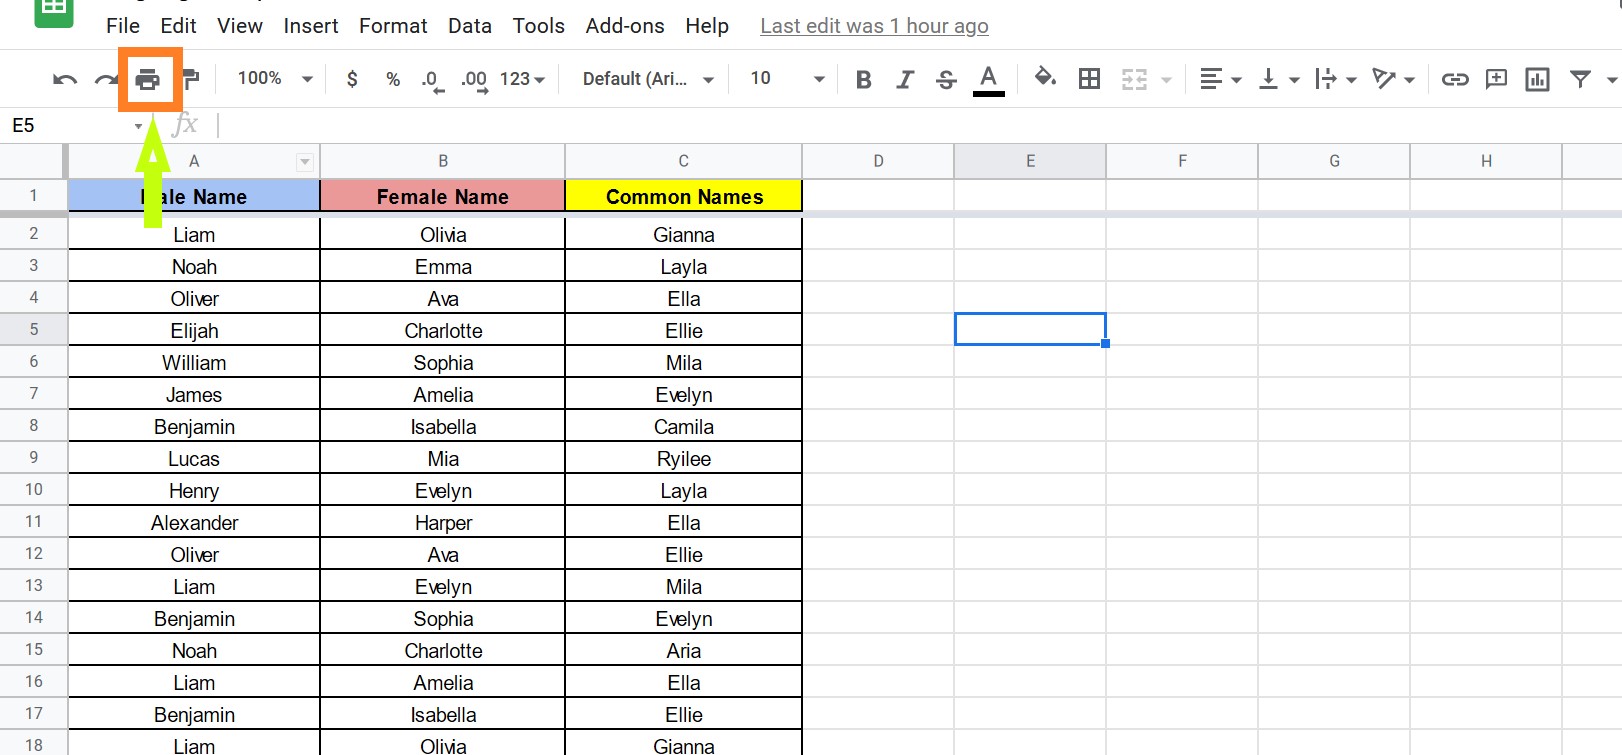
- Step 1: Click on “File” and select the “Print” option or just simply click the Print icon from the toolbar.
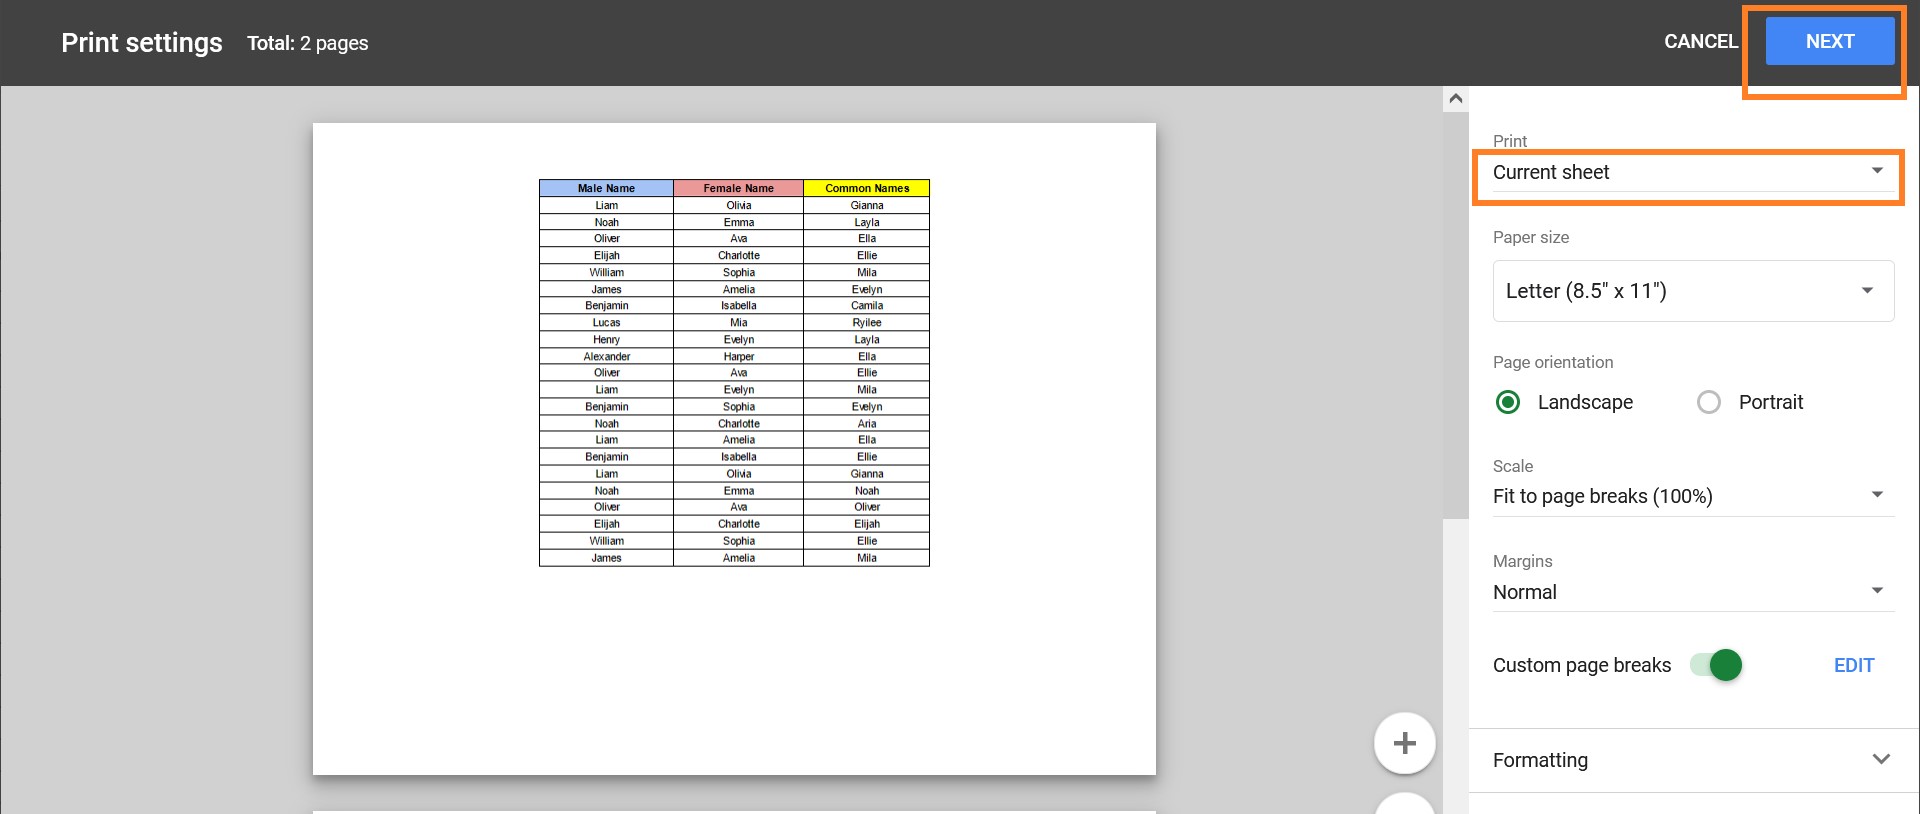
- Step 2: Select “Current Sheet” from the Print menu.
- Step 3: Click on “Next” and send it to the printer by using the print management programme included with your operating system.
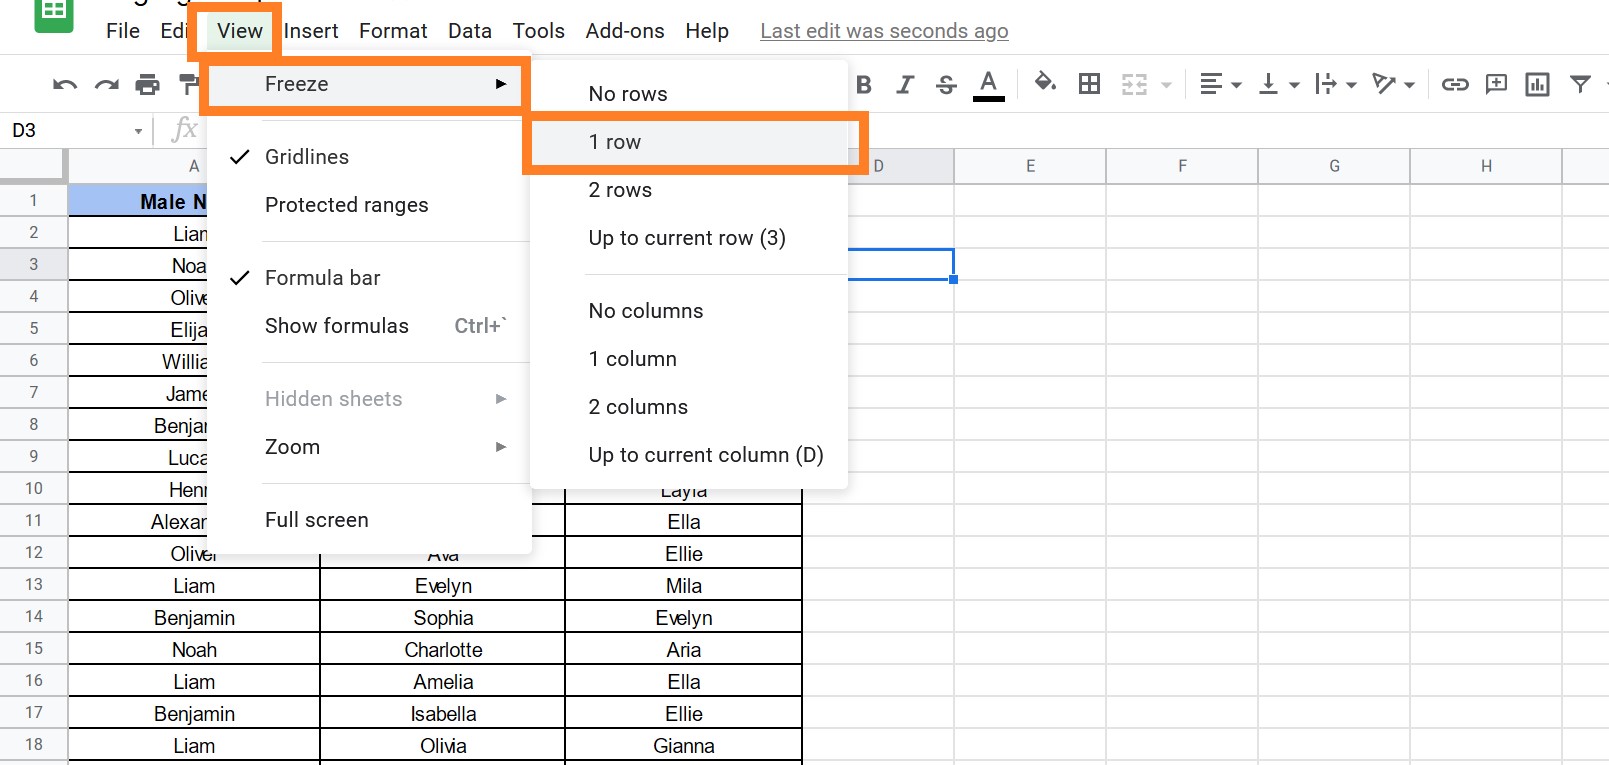
How to Print Headers Rows on each Page?
One can make use of the Google Sheets Print header rows to contextualise the cell data. This will help us to have the fixed headers on all the pages which will further help us to view the paper without any confusion.
- Step 1: Click on the “View” menu and select “Freeze” from the drop-down menu.
- Step 2: Now select the 1 Row from Freeze.
- Step 3: Now click on the “Print” icon.
- Step 4: Here you will see the fixed headers for all the pages.
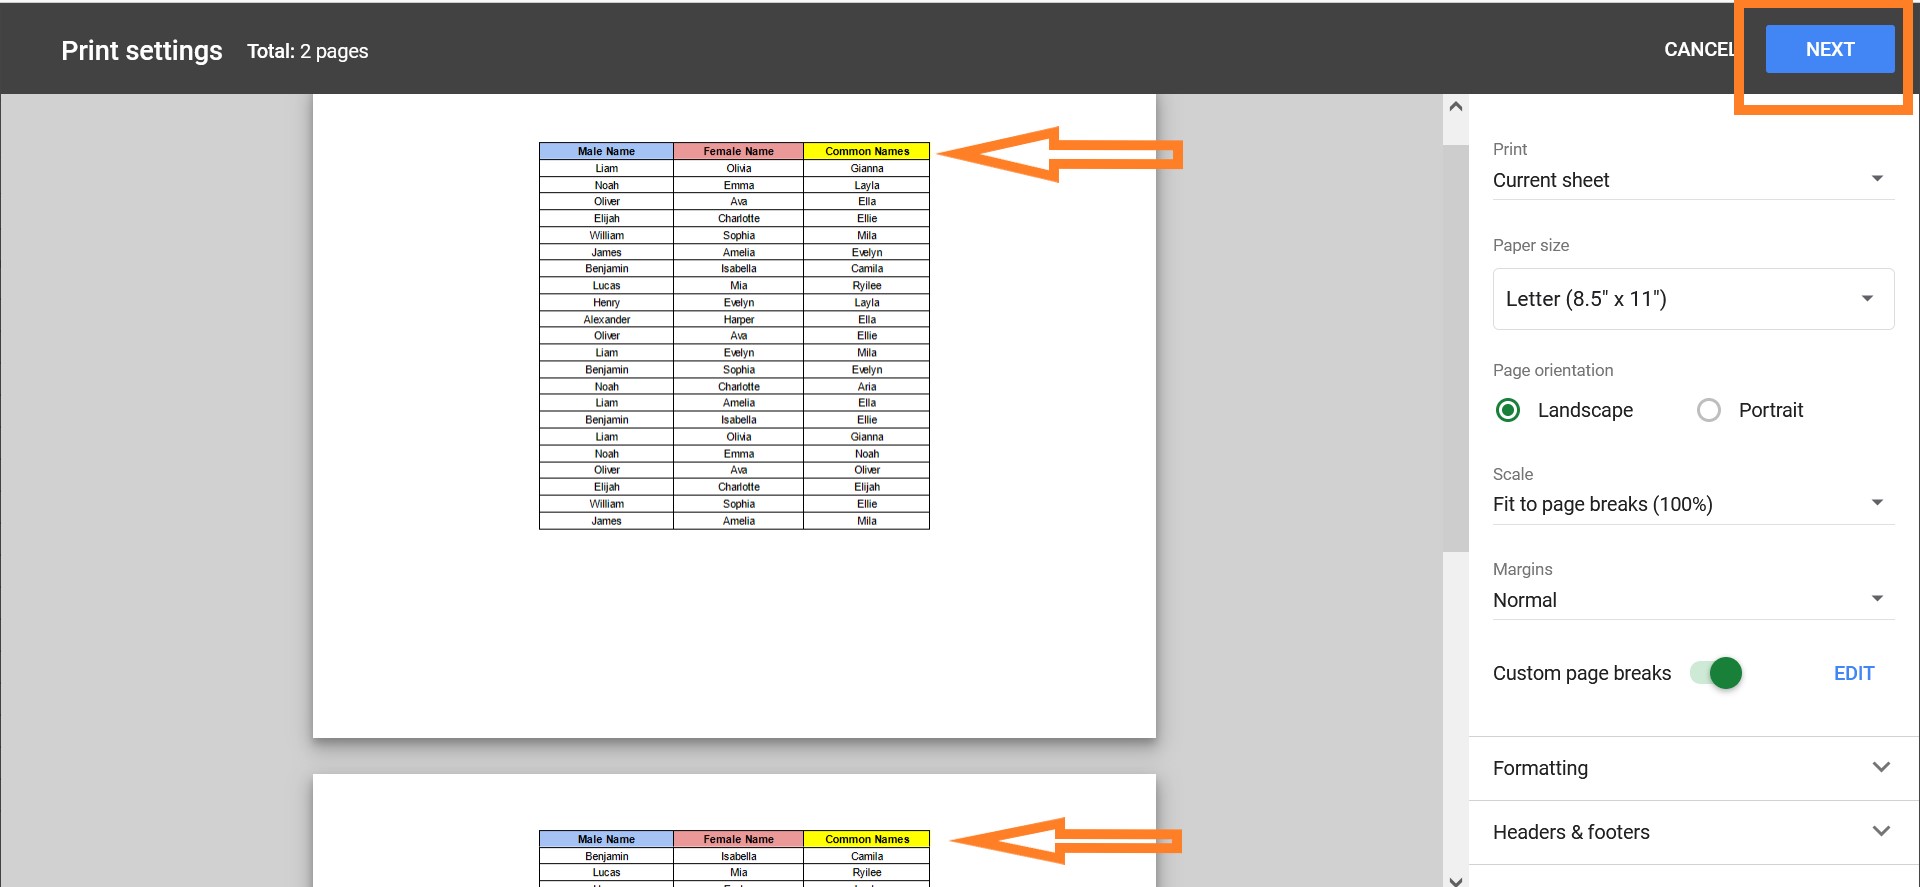
- Step 5: Click on “Next” and select the “Print” icon.
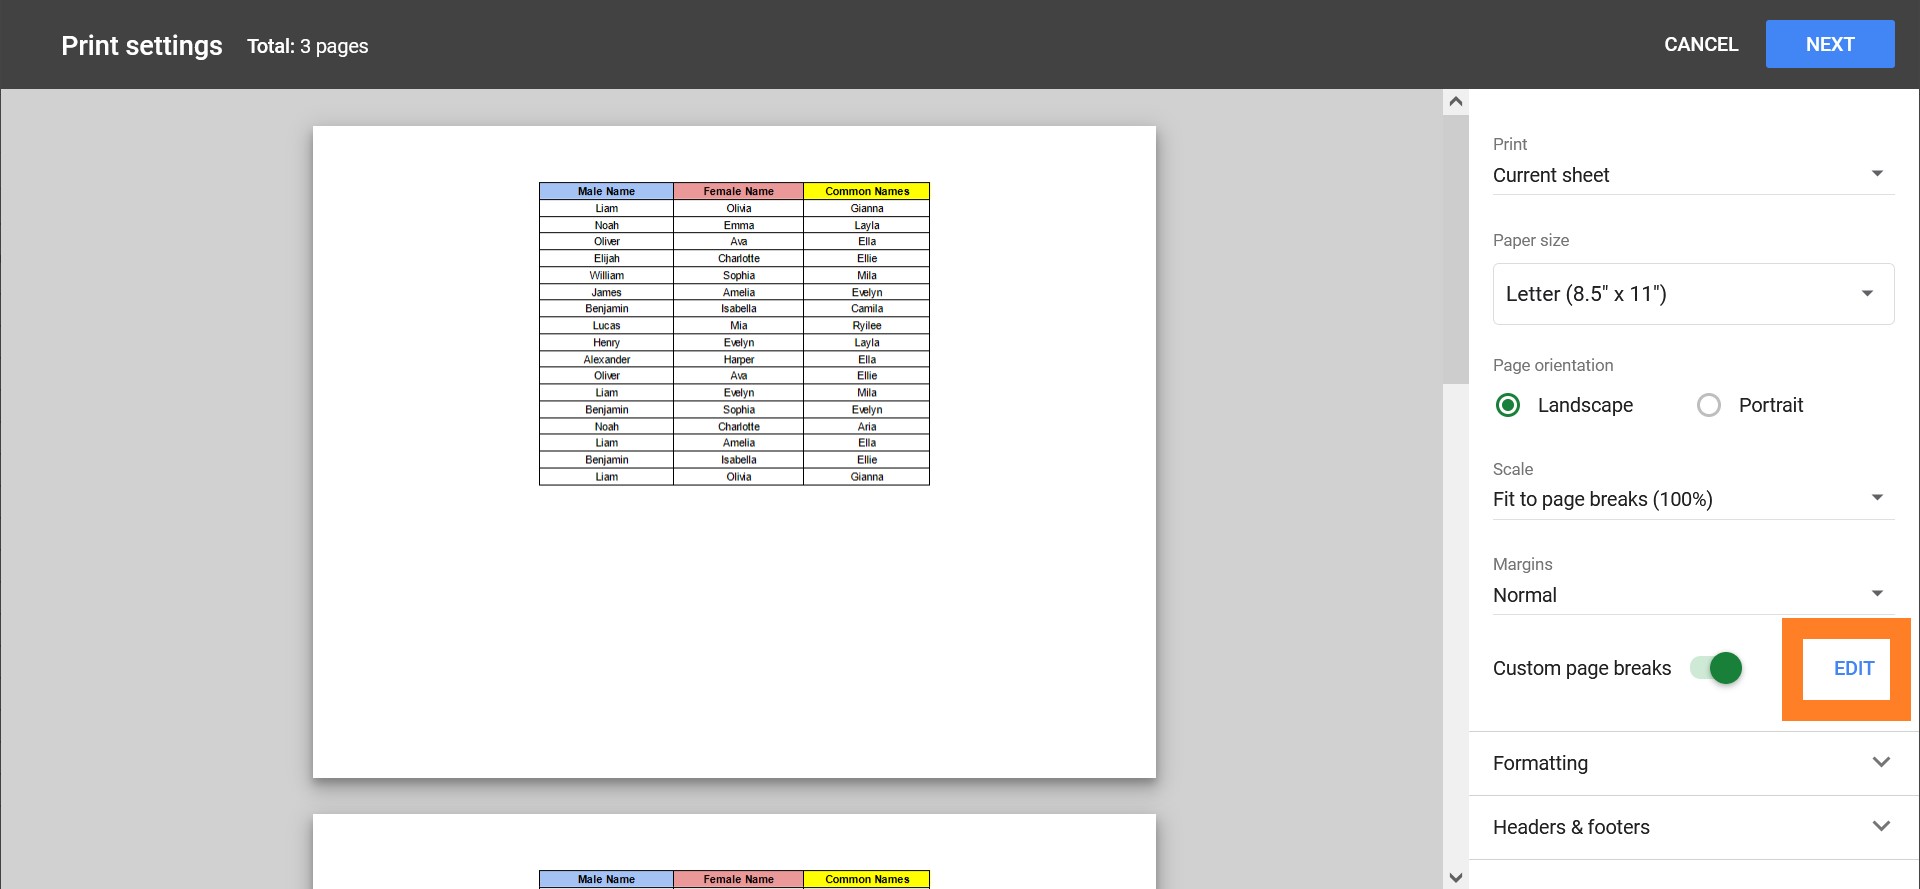
Setting Custom Page Breaks in Google Sheets
Google Sheets allows you to customize the print area on a per-page basis. This can be extremely beneficial when it comes to data curation.
For example, you might want to display 20 rows of data per page from a spreadsheet with 100 lines, but Sheets only displays 23 rows per page by default. You can change Sheets to utilize more logical page breakpoints.
Follow the steps listed below to set the custom Page Breaks in Google Sheets:
- Step 1: Select the cells and click on the “Print” icon.
- Step 2: In the “Print Settings” window, move to the “SET CUSTOM PAGE BREAKS” section.
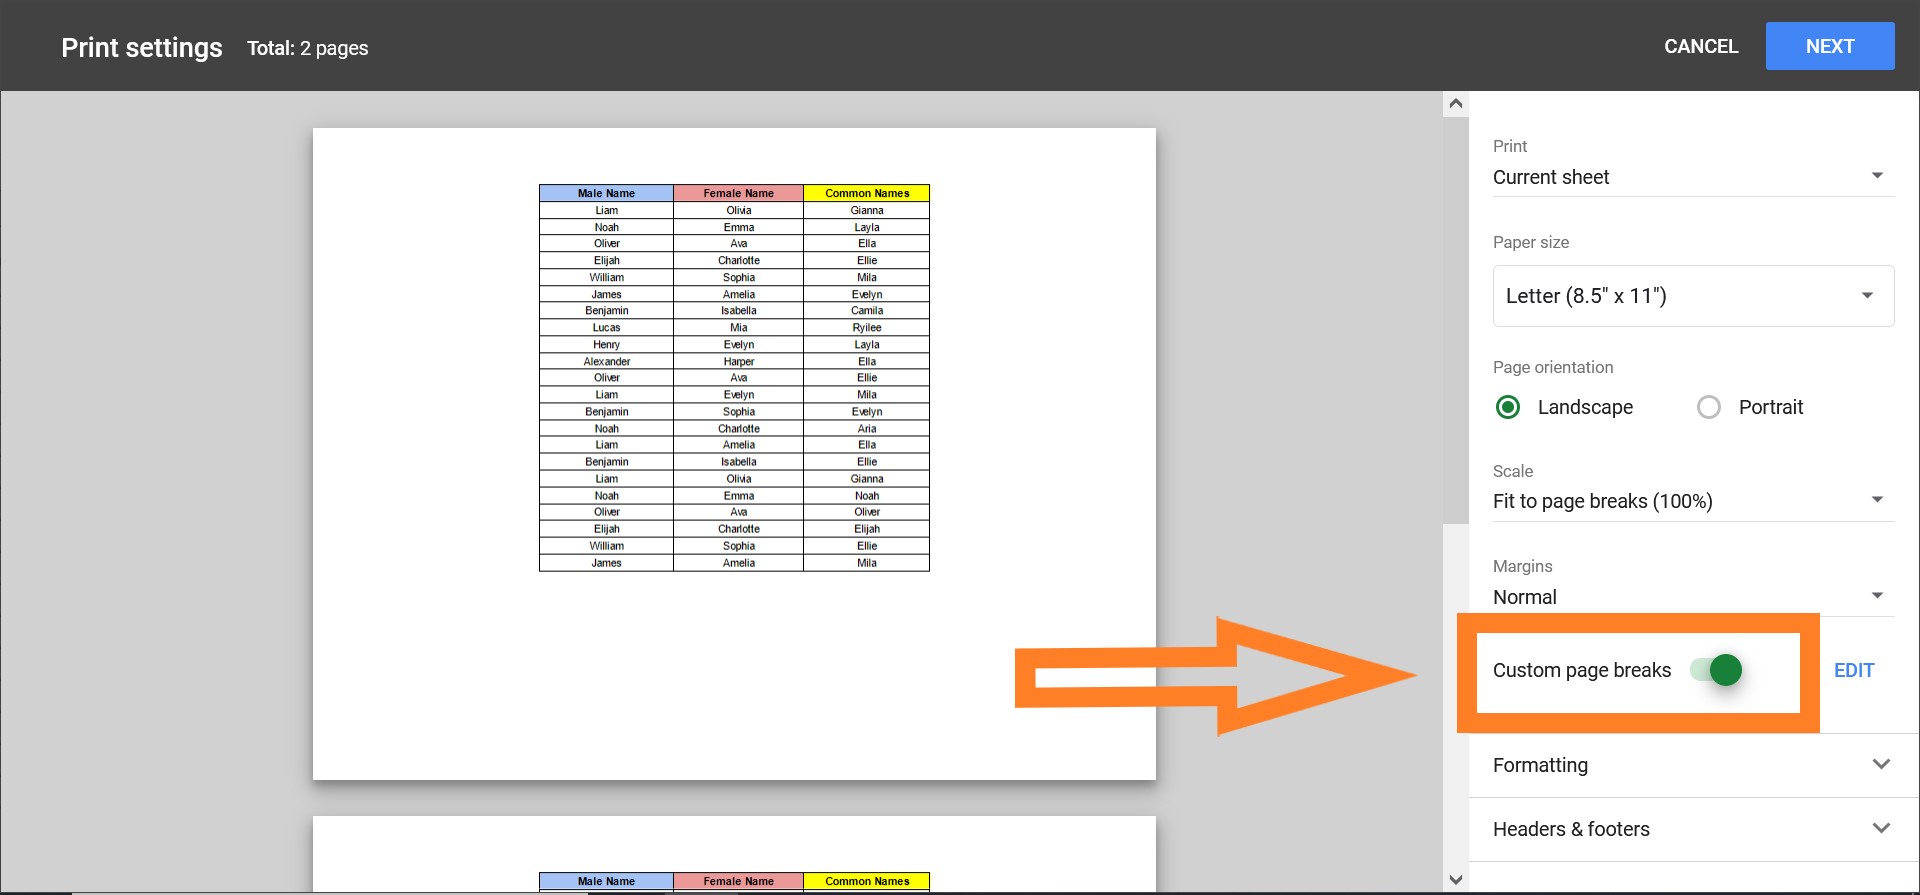
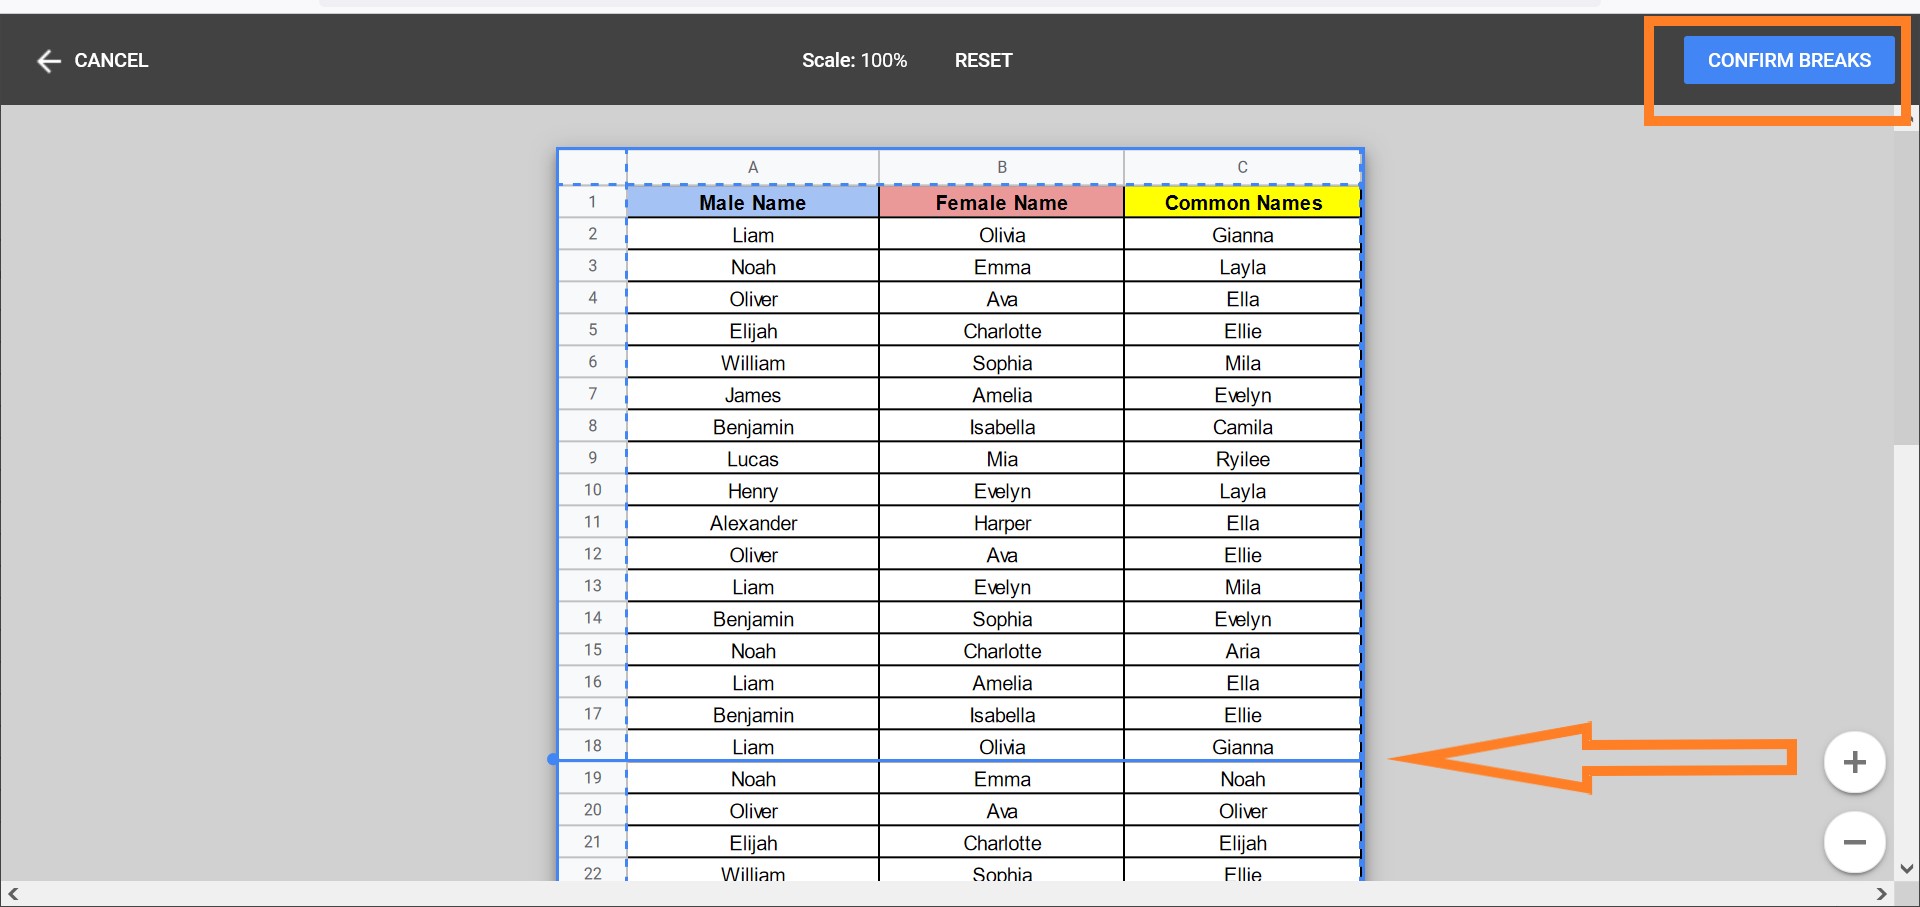
- Step 3: Here you can resize the page numbers by dragging the dotted cell as shown below.
- Step 4: As soon as you have chosen the page breaks, click on “Confirm Breaks“.
- Step 5: See the preview link and Click on “Next“.
- Step 6: Click on the “Print” icon and the required data will be printed as per the page breaks.
You can also edit your Page break as and when required from the Print Settings.
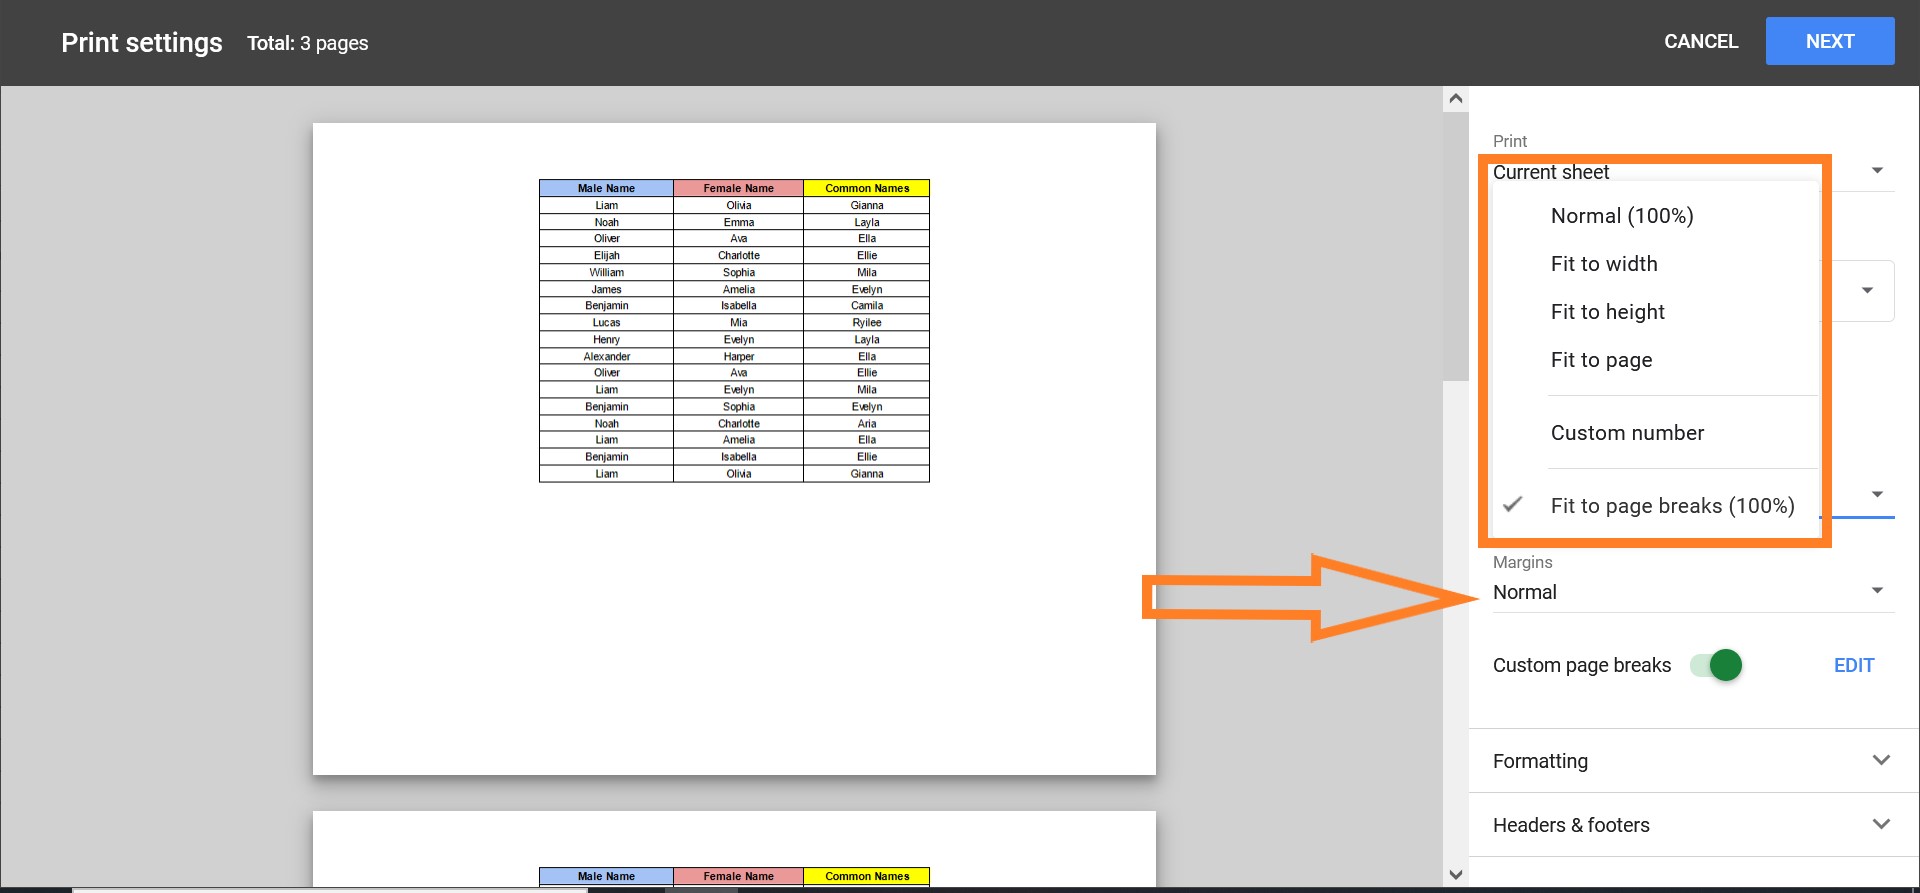
Adjusting Scale and Margin to Fit in Google Sheets
Setting the print range isn’t usually the end of your job. Google Sheets will hardly default to a printing configuration within the preset range which results in a poor print experience. Thus to overcome this issue, one can use the Scale and Margin settings.
Margin Settings in Google Sheets
- Normal: This is one of the default settings which goes with all the printing options.
- Narrow: This setting will make each page take up more space. As a result of this option, fewer printed pages are produced, but each page contains more information.
- Wide: When this option is selected, extra whitespace is created around the contents on each page. On each page, it can show fewer columns and rows.
- Page Orientation: You may also change the page orientation between landscape and portrait to better match your data.
Scale Settings in Google Sheets
- Fit to Height: This reduces the size of the cells so that all rows can fit on a single page. This is handy for printing data that has a lot of columns but not a lot of rows.
- Fit to Width: This option shrinks the cells to fit all columns on one page. This comes in handy when printing data with a lot of rows but few columns.
- Fit to Page: If this option is selected, the full selected range will be displayed on a single page. It’s useful for narrowing down data ranges.