We frequently find ourselves needing to rearrange columns in our Google Sheets. For example, sometimes we want to bring two columns next to each other as an afterthought, and other times we just want to compare their values.
So let’s understand how to move columns with the help of Google Sheet tips provided on this page. Read on to find more.
|
Table of Contents |
How to Move Columns in Google Sheets?
We can move columns in Google Spreadsheet with the help of the following 3 methods:
- Using Drag-and-drop
- Using the ‘Move left / ‘Move right’ tool
- Using Cut, Insert, Paste and Delete
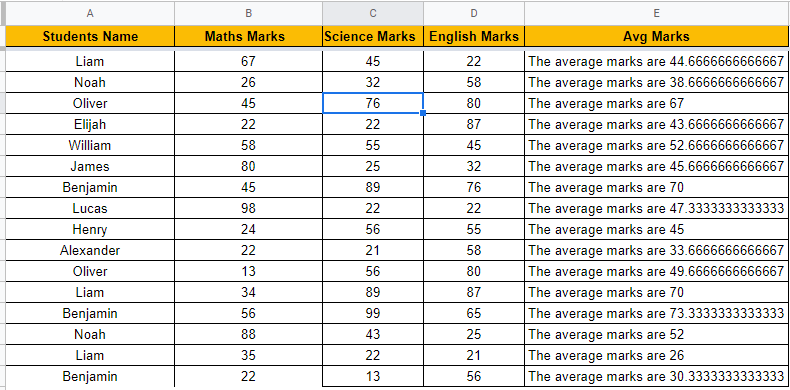
Let’s consider the following dataset in Google Sheets, in which we would like to move the columns.
Use Drag and Drop Option to Move Columns in Google Sheets
This is the quickest and simplest method because it only requires a quick movement of the pointer. Follow the steps as listed below to move the columns with the help of the drag and drop option in Google Sheets:
- Step 1: Open the Google Spreadsheet.
- Step 2: Now head to the column which you would like to move.
- Step 3: Select the header of the column and now start moving the column to the cell where you like to move.
- Step 4: The selected cell will be moved now.
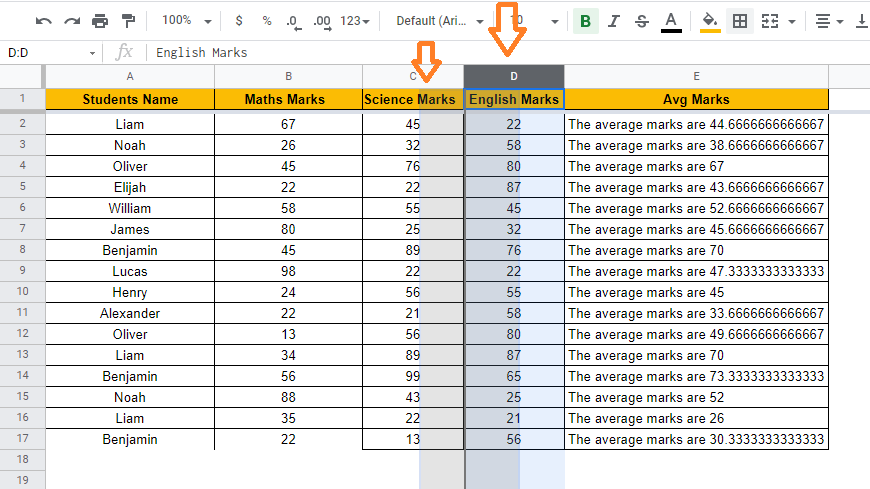
If you move the column to the left, all the columns following and including your destination column will shift to the right to make room for the newly moved column.
- Google Sheets Keyboard Shortcuts for PC, MAC, Chrome OS
- How to Wrap Text in Google Sheets: Expand Cell using Text Wrap
- How to Sort by Color in Google Sheets: Multiple Color Sort/Filter by Color
We moved a single column in this example, but you can also select multiple consecutive columns and move them together in the same way.
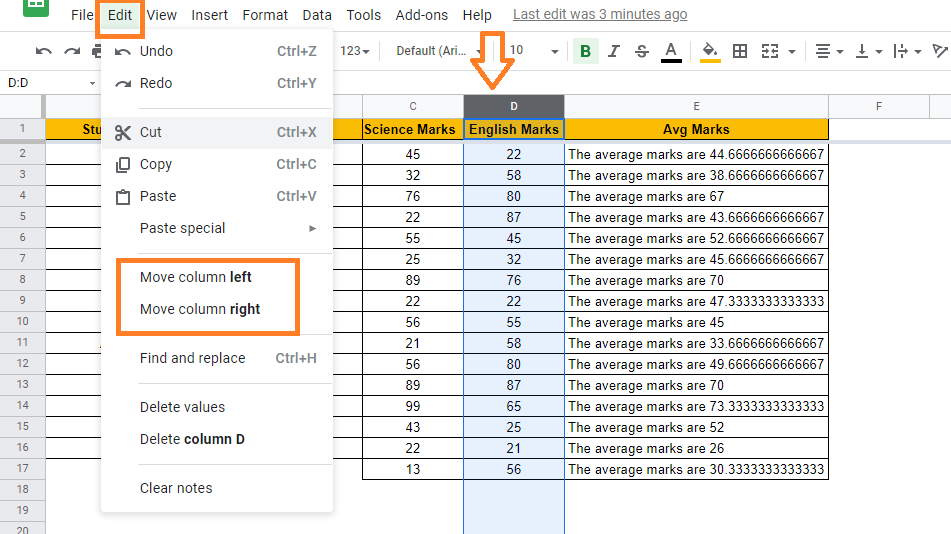
Move Columns in Google Sheets using Move Left/ Move Right Function
You can use this method to move your column one column to the left or right at a time. If you simply want to swap columns or a set of columns, this method is ideal.
Follow the steps as listed below to move a column in Google Sheets using Move Left or Move Right function:
- Step 1: Open the Google Sheets where you would like to move the columns.
- Step 2: Now select the columns which you would like to move.
- Step 3: Head to the toolbar in the Google Sheets.
- Step 4: Click on “Tools” and the drop-down menu will open.
- Step 5: Now select “Move Left” to move the columns to the left.
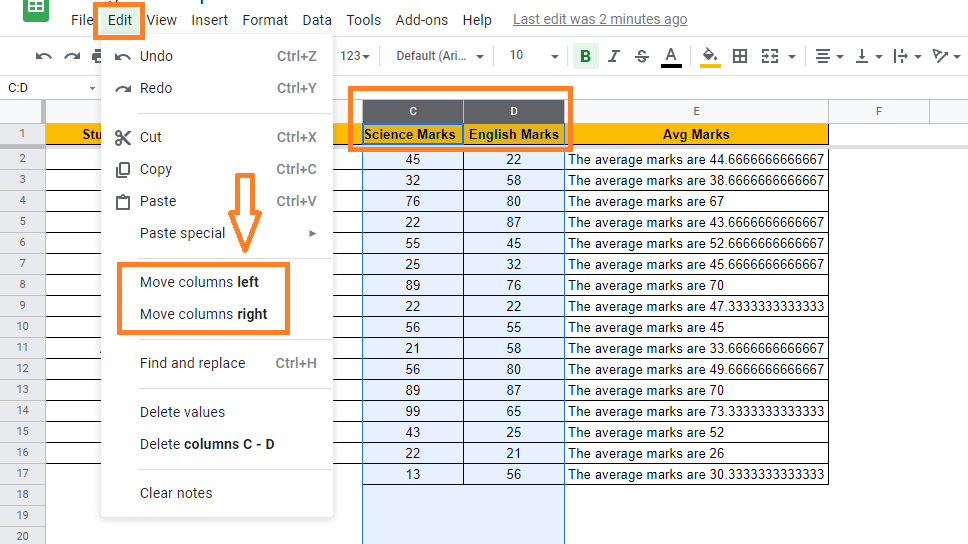
- Step 6: To move the columns to the right side of the Google Sheets, select “Move Right“.
- Step 7: The selected cells will be moved.
Using Cut, Copy, Paste to Move Columns in Google Sheets
If you only have a few columns to work with, the first two methods are sufficient. However, if you are working with large datasets with data that spans multiple columns and multiple screen scrolls, these two methods may feel clunky.
To help with this, follow the steps as listed below to move columns using Cut, Copy, Insert and Paste methods:
- Step 1: Choose the column or columns to be moved. You can do so by clicking on the column header.
- Step 2: Right-click your selection and choose ‘Cut’ from the context menu that appears. Alternatively, you can use the keyboard shortcut CTRL+X (on a PC) or CMD+X (on a Mac) (on a Mac).
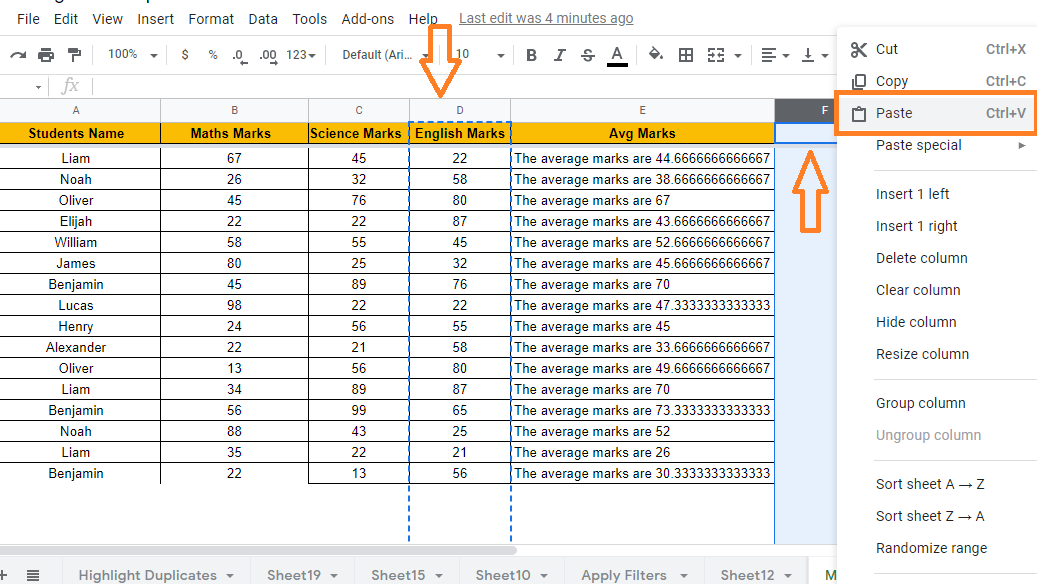
- Step 3: Select the column header next to (to the right of) your destination column. Choose column F in our example.
- Step 4: Right-click your selection and choose ‘Insert 1 left.’ This will move your selected column one position to the right, making way for a new column.
- Step 5: If you need to move more than one column, repeat step 4 as many times as necessary to accommodate the desired number of columns.
- Step 6: Now, choose the column header(s) for your destination column (s) In our example, choose column F.
- Step 7: Then, on a PC, use the keyboard shortcut CTRL+V or CMD+V. (on a Mac). This should paste the previously cut column(s) into the newly created space.
- Step 8: You should notice that your original column(s) (that you had cut) are now empty. You can get rid of them by right-clicking on the empty column(s) and selecting the ‘Delete column’ option from the context menu that appears.
